Using Retrofit and RxJava to fetch data from a REST API
Retrofit is a HTTP Client for Android and Java developed by Square. We are going to integrate Retrofit with RxJava to simplify threading in our app. In addition, we will also integrate RxAndroid to make network calls. We will create a simple app that fetches JSON data and displays it in a recyclerview layout using the above libraries.
Import libraries
First off, create a new Android app with an Empty Activity. Head over to your build.gradle file and import the following libraries:
For Retrofit:
implementation ‘com.squareup.retrofit2:adapter-rxjava2:2.3.0’ implementation ‘com.squareup.retrofit2:converter-gson:2.3.0’
For RxJava:
implementation ‘io.reactivex.rxjava2:rxandroid:2.0.1’
implementation ‘io.reactivex.rxjava2:rxjava:2.1.7’
And don’t forget the design library if not yet migrated to AndroidX:
implementation ‘com.android.support:design:28.0.0’
For AndroidX users:
implementation ‘com.google.android.material:material:1.1.0-alpha09’
After importing the libraries, you can now sync your project.
Fetching JSON Data
For our JSON data, we will use JsonPlaceholder which is a fake online REST API for testing and prototyping. Head over to https://jsonplaceholder.typicode.com/ and click on /posts(https://jsonplaceholder.typicode.com/posts). Select all the posts JSON data. We are going to convert this JSON to POJO. There are a number of online tools to achieve this but I used http://json2csharp.com/ to generate my model from the JSON.
Creating our model
Create a new package and name it Model. On the Model package create a new Java class and name it Posts. Paste your generated POJO here and create the matching constructors.
Creating API Client
Create a new package and name it Retrofit. On this package create a new interface and name it MyAPI. We are going to later call this interface and implementing it in our Main class.
On the Retrofit package, create a Java class and name it RetrofitClient. Here, we are going to add our baseUrl and create an instance of our RetrofitClient. The base URL is needed for all service calls and a converter factory to take care of parsing the data and to receive the responses.
Creating the layout
Next, we are going to design the layout for our posts. We are going to use CardView for the individual posts and RecyclerView for the main layout.
For the main layout:
In addition, in our styles.xml file, I prefer a theme with NoActionBar.
Creating our adapter
We are going to need an adapter in order to bind our data to the view or layout. Create a new package and name it Adapter. On the Adapter package, create a new Java class and name it PostViewHolder. Here, we are going to initialize our textviews which will be implemented in our recyclerview.
Create another Java class in our Adapter package and name it PostsAdapter. Here we will inflate our layout and bind it to the view. In this case, each textview has a unique id which represents an object in our model.
Displaying the data and running the app
For the final step, we are going to call the above files and implement them accordingly in our MainActivity. We are going to implement CompositeDisposable to dispose the data once our activity is destroyed. We are also going to implement Schedulers in our activity. I found a good resource to explain schedulers here.
And don’t forget to add INTERNET permission in our AndroidManifest file as well.
<uses-permission android:name=”android.permission.INTERNET”/>
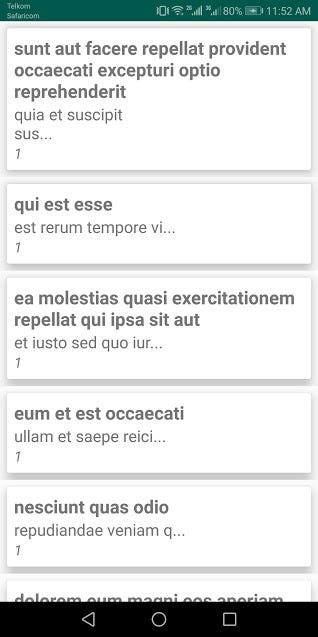
It’s that simple. You can now run your app and see the results.
You can check the final source code here.
I hope you see how easy it is to implement Retrofit and RxJava in your apps to fetch JSON data. Happy coding!